Step-by-Step Guide for Tenants: End of Tenancy Cleaning
Posted on 02/07/2025
Step-by-Step Guide for Tenants: End of Tenancy Cleaning
End of tenancy cleaning is a crucial part of moving out for any tenant. Not only does it ensure you leave the property in the best possible condition, but it also significantly increases your chances of getting your full deposit back. Landlords and letting agents expect a thorough and professional clean, so understanding what is involved--and how to tackle it efficiently--is paramount.

Why End of Tenancy Cleaning is Essential for Tenants
Moving at the end of a rental period can be stressful, but performing a end of lease cleaning (another way of saying end of tenancy cleaning) isn't just about courtesy. It's usually required by your tenancy agreement and often checked by landlords or letting agents. Professional-level cleaning can:
- Ensure the return of your security deposit
- Prevent disputes or deductions
- Leave a positive impression for references
- Meet the landlord's cleaning standards
- Comply with tenancy contract legal obligations
Skipping or performing a subpar end of tenancy clean might result in financial losses or even legal trouble. That's why following a detailed, step-by-step approach is key.
Preparing for Your End of Tenancy Cleaning
1. Read Your Tenancy Agreement
Start by reviewing your rental agreement. Many landlords specify expected standards or areas needing extra attention. Knowing what your landlord requires will help you avoid surprises during the checkout inspection.
2. Gather the Necessary Cleaning Supplies
Stock up on quality cleaning products and equipment. Here's a typical checklist:
- Multi-purpose cleaner
- Glass and window spray
- Degreaser (for kitchens)
- Limescale remover (for bathrooms)
- Antibacterial sprays
- Vacuum cleaner and mop
- Soft and hard sponges
- Microfiber cloths
- Gloves and masks (for hygiene and safety)
- Garbage bags
If your landlord requires a professional cleaning, keep the receipt as proof.
3. Plan the Cleaning Schedule
Set aside enough time--it might take one to two full days, even longer for larger properties or if you have pets. Cleaning after you've moved all your belongings is easiest because you'll have full access to every area.
Comprehensive Step-by-Step End of Tenancy Cleaning Guide
Step 1: Declutter and Remove Personal Belongings
Start by removing everything that isn't part of the property. Check cupboards and storage areas for forgotten items. A clear space makes cleaning much easier. Dispose of all rubbish and unwanted items responsibly.
Step 2: Dust and Clean from Top to Bottom
Always begin at the highest points in each room and work your way down. This helps avoid dust or debris falling on already-cleaned surfaces. Pay special attention to:
- Ceilings & cornices (wipe corners for cobwebs)
- Light fixtures and ceiling fans
- Wall hangings and shelves
- Window sills and curtain rails
Step 3: Clean Windows and Mirrors
Streak-free windows and mirrors make a huge difference. Use glass cleaner or a vinegar-water mix. Don't forget window frames, sills, and tracks. Clean both inside and outside if possible.
Step 4: Wipe Down Walls, Doors, and Skirting Boards
Marks on walls and scuffs on doors stand out during inspections. Use a damp (not soaking) cloth and gentle all-purpose cleaner. Test on a hidden patch first to avoid damage.
Step 5: Focus on Kitchen Deep Cleaning
Kitchens are often scrutinized during end of tenancy inspections. Be meticulous:
- Remove all food and clean inside cupboards, drawers, and pantries
- Degrease and scrub countertops, splashbacks, and tiles
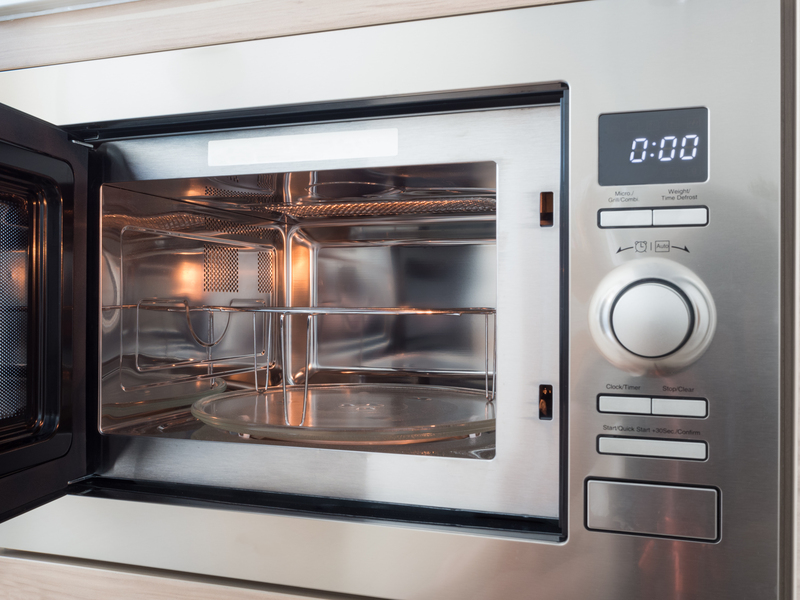
- Clean inside and outside of oven, hob, microwave, extractor fans, and fridge/freezer
- Scrub the sink, taps, and plugholes
- Empty food waste and disinfect bins
Don't leave crumbs or greasy residue behind. Appliances should sparkle!
Step 6: Scrub Bathrooms and Toilets Thoroughly
A spotless bathroom is a must. Take extra care with the following:
- Descale and polish taps, showerheads, and tiles
- Scrub the toilet bowl, seat, and flush button
- Wash and shine mirrors and glass shower screens
- Wipe all surfaces and fixtures including cabinets and shelves
- Clean grout, drain covers, and extractor fans
- Disinfect the bath, shower tray, and sink
Mould, hard water stains, and soap scum are common deductions--eliminate all traces!
Step 7: Clean Bedrooms and Living Areas
- Dust and wipe all surfaces, including wardrobes, shelves, skirting boards, and switches
- Clean under beds and behind furniture
- Launder curtains or clean blinds, if required
- Polish woodwork and mirrors
Always check, and if needed, wipe radiators and behind them.
Step 8: Floors and Carpets
- Vacuum all carpets thoroughly, including edges and corners
- If you've had pets or there are stains, consider professional carpet cleaning (some contracts require it)
- Mop hard floors with the correct solution for their type (wood, vinyl, tile, etc.)
- Clean thresholds and floor trims
Step 9: Clean Utility Areas & Other Spaces
- Wipe washing machine drum, detergent drawer, and filters
- Empty and wipe dryer filters and lint traps
- Clean inside boiler and airing cupboards
- Tidy garden, balcony, and outdoor bins if applicable
Don't overlook these hidden or out-of-the-way spots--letting agents often check them!
Step 10: Finishing Touches and Inspection-Ready Checklist
Before leaving, do a final walk-through of the entire property:
- Check every surface for missed spots or smears
- Repair minor damage (nail holes, scuffs)
- Replace spent bulbs and batteries in remotes or smoke alarms
- Empty bins and air every room
- Close all windows and lock up if required
Take photos or videos as evidence of the property's condition, especially for deposit recovery disputes.
DIY vs. Professional End of Tenancy Cleaning: Which Should Tenants Choose?
Some tenancy agreements require a professional end of tenancy clean. Even if they don't, you may want to weigh your options:
- DIY End of Tenancy Cleaning: Often cheaper, gives personal control over the process, but can be time-consuming and physically demanding. You need to meet the expected standards, and you may have to buy or rent specialised equipment.
- Professional Cleaning Services: Convenient and thorough. Cleaning companies provide a receipt or certificate (important for your landlord). Professionals have experience with common landlord checklists and hard-to-remove stains or odours. The cost might be offset by avoiding deposit deductions.
How to Choose a Cleaning Service
- Read reviews and check customer testimonials
- Look for companies specialising in end of tenancy cleans
- Compare prices, but also ask what is included
- Ask if they offer a "cleaning guarantee"--some return to fix issues for free if your landlord isn't happy
Common Mistakes Tenants Make with End of Tenancy Cleans
- Skipping appliances such as ovens or fridges
- Leaving hair or pet odours in carpets and furniture
- Overlooking skirting boards, switches, and sockets
- Not cleaning under furniture or behind appliances
- Dismissing "hidden" mould or limescale
- Neglecting to check for missed items in cupboards and drawers
Avoid these pitfalls and you'll dramatically boost your chances of getting a deposit refund!
End of Tenancy Cleaning Checklist for Tenants
- Decluttered and removed all personal belongings
- Dusted all surfaces, ceilings, and light fittings
- Cleaned all windows (inside and outside if possible), sills and tracks
- Wiped down doors, handles, and skirting boards
- Scrubbed kitchen surfaces, including oven, hob, fridge, and microwave inside-out
- Deep-cleaned bathroom fixtures, tiles, mirrors, and toilets
- Vacuumed and mopped all floors; steam-cleaned carpets if needed
- Checked utility and storage areas
- Disposed of all rubbish and cleaned bins
- Fixed minor damages and replaced bulbs/batteries
- Taken date-stamped photos as evidence of cleanliness
Print or copy this checklist to make sure you cover every step.
What Happens After End of Tenancy Cleaning?
After the cleaning, your landlord or letting agent will conduct a final inspection. They will compare the property's condition with the initial check-in inventory and report. If the cleaning meets expectations, you'll usually receive your deposit back within a few weeks.
If there are issues, the landlord may raise concerns or arrange additional cleaning--often at your expense. This is why a meticulous end of tenancy clean is a good financial move.
Dealing with Deposit Disputes
- Always keep cleaning receipts and before/after photos
- Refer to your tenancy agreement for dispute resolution routes
- Use government-backed Tenancy Deposit Schemes if a compromise cannot be reached

Final Tips for a Successful End of Tenancy Clean
- Start planning early--don't leave the cleaning to the last minute
- Work methodically, room by room, from top to bottom
- Double-check hidden and "easy to forget" spots
- If in doubt, consult your landlord for their expectations
- Document everything for your records
With these steps, you'll not only meet your end of tenancy cleaning obligations, but you'll maximise your chance of a full deposit return and a positive landlord reference.
Conclusion: Why End of Tenancy Cleaning Matters for Every Tenant
A complete end of tenancy cleaning is essential for every tenant moving out. It protects your finances, ensures a hassle-free transition, and upholds your reputation as a responsible renter. Use this step-by-step guide to help you navigate the process, whether you opt for a DIY approach or professional cleaning. By ensuring all areas are spotless and covering every detail, you'll leave your rental property in exceptional condition, paving the way for a smooth check-out and a prompt return of your deposit.
If you're moving soon, start preparing now--and remember, a great end of tenancy cleaning isn't just about scrubbing, it's about protecting your interests and leaving the property exactly as you found it, if not better.


